

A month in the boatyard – part 2
So how this 1 month plan turned out? Well, spoiler alert; we’re still sitting on the hard, 5 months later. So what happened? What’s going on in that mystical time-sucking-black-hole that people call boatyard? How can a 3 weeks plan turn into a 5 months odyssey? I’m not sure. Maybe you can tell me. Here is what happened:
Day 1 : haul out
Day 2 :
- Prep work to get the mast to go down. Stripped most of the ceiling to access and disconnect all the electrical wires going to the mast. Removed the boom, all the cutter pins, loosen the turnbuckles and made sure the mast was ready to go. Took the dinghy of the boat to get some working room on deck. Labeled all wires and mark turnbuckles position so we can re-tension the rig
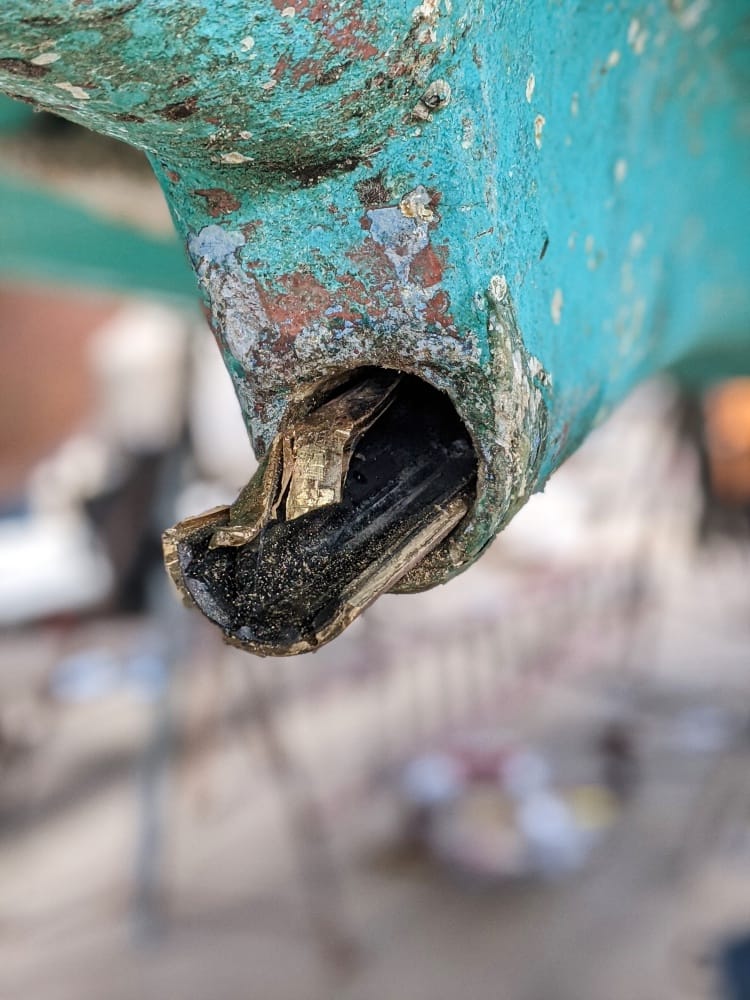
- Removed the propeller, disconnected the shaft coupling from the shaft and transmission.
- Removed the PSS and took the shaft off
- Pressed the cutlass bearing out of the strut.
Daily recap; the second cutlass bearing that we installed in Panama needs to be changed. AGAIN. Knowing we need to change it only 6 months after confirms our worst fear; we need to change our shaft…

Day 3:
- Crane showed up and we removed the mast
- Moved the boat and mast to its new location in the yard
- Inspected all the standing rigging
- Removed the in-mast furler motor from the mast
Daily recap: after getting help from Jamie (sailing Totem) who has extensive knowledge on rigging, the verdict is in. We need to change our rigging. All of it. The bad surprise of the shaft yesterday seems not so bad now.
Day 4:
- Stripped down the starboard side of the mast from all hardware (winches, spreaders, steps, cleats, clutches, etc) that needed to be inspected as well.
- Disassembled both furlers
- Got all the rigging mesured and spec out
- Send 18 requests for quotes for new rigging
- Send 13 requests for quotes for a new shaft
- Inspection of the mast hardware on STB side
Daily recap: it looks like some of the hardware needs to be changed as well. Mainly the spreader base and the tangs. Of course, those are the hardest pieces to find, and the most critical ones as well.
Day 5 :
- Removed the bow and aft chainplates, the only ones that we haven’t changed yet.
- Stripped port side of the mast hardware
- Spent most of the day trying to find a place to get new spreader base
Daily recap: Of course, both chainplates need to be changed! I’m starting to forget what optimism sounds like.

Day 6 :
- Sanded the mast
- Removed the tangs’ bolts from the mast
- Disassembled the furler
- Drilled a few holes in the rudder to see if water is in there.
- Talk to the yard about them custom making the new tangs we need, since nobody stock those anymore
Daily recap: of course water was in the rudder. The great lake was in there.
Day 7:
- Clearly, we need more things then we anticipated. Spent the morning ordering parts and trying to find those dang spreader base.
- Removed the old SSB grounding plate
- Removed the speed log thru-hull and grind the fiberglass in the anticipation to patch the hole permenently
- Attempt to remove the cutlass bearing from the stern tube. 6 hours later; no luck
Daily recap: The spreader bases are driving me crazy. Got a quote from a machine shop who could do them. With a 6 weeks lead time, for the sweet sweet price of 900$ per spreader base. We need 8 of them!!! That’s 7200 + taxes + shipping ladies and gentleman! I’m not sure my kidneys are worth that! Meanwhile, Cass is in discussion with a guy in Spain who claim could 3D print us the part in stainless steel. We drink a beer that night marveling at the realization some people can 3D print stainless steel.


Day 8 :
- Finally managed to remove the cutlass bearing : i cut it through.
- Yard came back to us with a prototype in steel for the tangs
- Started sanding the mast to remove all the old paint that kept flaking everywhere
Daily recap: the yard isn’t able to make the tangs or the chainplates like we were hoping. We’ll need to find a machine shop somewhere to make those. More phone calls. Tangs are added to our list of “things that nobody seem to be able to do for less than the price of my 2 kids on the black market”
Day 9
- Start sanding the hull
Daily recap : after 9 hours spent sending the hull in awkward position, we discovered a few things. First, I’m not 20 anymore and I’m not sure Mexico has enough Advil. Second, there’s less paint to send that I was expecting, but there’s barely any barrier coat under the paint. And that bad! If there isn’t any barrier coat, it means potential for blisters. We need to dig more


Day 10
- Sand the hull
- Eat Advils like candies
Daily recap: quotes for new rigging are starting to come in. Shaft as well. Combined, we’re looking at half a year of our cruising budget! That’s too bad, because paying to get that hull sandblasted sure looks like a smart idea. Also, lots of blisters started to show up. Which means, I need to sand much more than we anticipated.
Day 11
- Sand the hull
- My arms are a mix of jello and jalapeños. I develop a method for holding the sander upside down between my shoulder and my cheek to sand under the boat. I marvel at my genius. The Mexicans looking at me think I’m the dumbest gringos they’ve seen in a long time.
Daily recap: Big milestone; I’ve sanded half of the boat! On the one side. Not sure why you bought a boat with 2 sides? Seems completely stupid in insight.
So really, I’m 1/4 of the job done, which means I’m looking at another solid 7 days of sanding in front of me. That’s 70 hours, best case.

Day 12
- Sand the hull
Daily recap: After a few beers, we realize the madness of it all and decide to get Pablo sand blasted. The blistering is bad enough that Pablo looks like a polkadot boat. It’s a hard decision to take with so many bad surprises and unplanned costs. But it’s the right one. I’ve burned through 179 sanding pads already. By the time I’m done, we’ll have spent 400$ worth of sand paper. That’s 1/3 of the sandblasting cost. Add another 800 in Advil’s and we’re actually saving some money. I feel instantly relieve that I won’t need to sand more. And so dumb of not having taken that decision 4 days ago. I’m truly the dumbest gringo in Mexico!

Day 13
- Finished sanding the mast
- Prep the boat for sandblasting
Daily recap; No sure what happened? I thought I was through with sanding? I now officially hate sanding.
Day 15 to 19
- While the boat gets sandblasted we spend our days shopping for all the new parts new need
- I over-ventilate every half hour while look at our budget spreadsheet


Day 20 to 40
- Sam working like crazy on Pablo
Day 41
- Why are we doing this again? When can we splash? What happened to that 3 weeks plan?
Day 42 to whatever
- Boatyard black hole
… to be continued …


This is one awesome blog article.
Great blog post.